Setting up a Virtual Machine
Besides Docker, a virtual machine is another way of providing an means for evaluating and working with the EOA infrastructure. Especially in environments where Docker might be too difficult to set up.
Specifications
The specifications used for the virtual machine are the following and were entered during installation:
- Operating system
Debian debian-10.2.0-amd64-netinst
- Memory
2GB
- Hard Disk
20GB
- Language
en_US
- Root account
disabled
- Machine name
eoavm
- User
eoa-user, eoa304
- Further packages to be installed during installation
none
- Desktop environment
LXDE
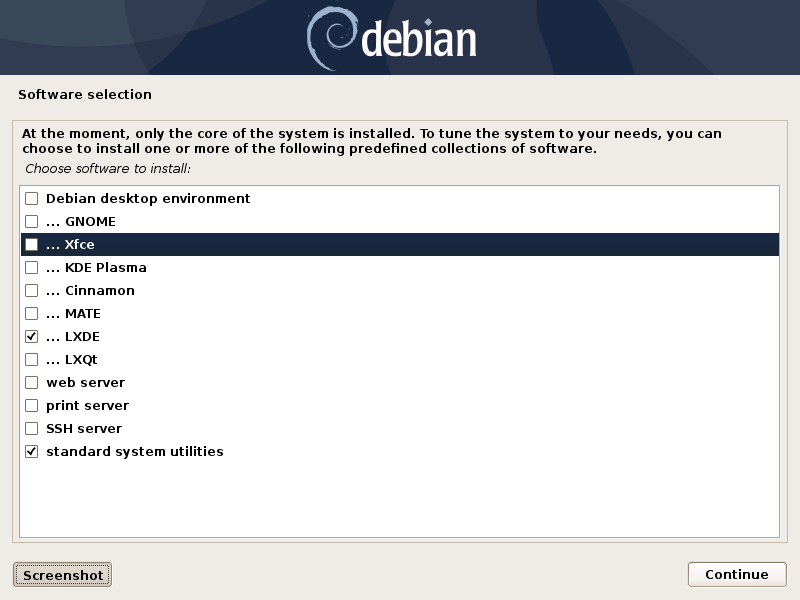
Software selection step during installation
Further setup
Automatic login
To the file /etc/lightdm/lightdm.conf the following setting was added:
[SeatDefaults]
autologin-user=eoa-user
autologin-user-timeout=0
user-session=LXDE
greeter-session=lightdm-gtk-greeter
After a restart, the user eoa-user gets automatically logged in, and there is no need to enter a password.
Installation of further packages
Adding contrib repository
Add the contrib repository in order to install the msttcorefonts. This is done in the file /etc/apt/sources.list. Simply add contrib after main:
deb http://ftp.gwdg.de/debian/ buster main contrib
deb-src http://ftp.gwdg.de/debian/ buster main contrib

deb http://security.debian.org/debian-security buster/updates main contrib
deb-src http://security.debian.org/debian-security buster/updates main contrib

deb http://ftp.gwdg.de/debian/ buster-updates main contrib
deb-src http://ftp.gwdg.de/debian/ buster-updates main contrib
To make the additional sources available, update the index with:
sudo apt-get update
and get system updates with:
sudo apt-get upgrade
Adding packages for EOA infrastructure
Note
These requirements are gathered together from the installation instructions found at https://github.molgen.mpg.de/EditionOpenAccess/eoa-1.5/blob/master/Dockerfile and https://github.molgen.mpg.de/EditionOpenAccess/EOASkripts/blob/master/Dockerfile.
Copy the following in the command line to install the packages:
sudo apt-get install -y --no-install-recommends graphicsmagick pandoc pandoc-citeproc curl biber texlive-xetex texlive-fonts-extra ttf-mscorefonts-installer fonts-lmodern fonts-noto-cjk texlive-lang-chinese texlive-science texlive-bibtex-extra tex-gyre less tralics texlive-extra-utils tex4ht tidy ghostscript default-jre texlive-lang-german texlive-lang-english texlive-lang-italian texlive-lang-french libsasl2-dev python-dev libldap2-dev libssl-dev git openssh-server
Installing yarn
In order to customize the webdesign, a program called yarn needs to be installed from the source. According to the instructions found at https://classic.yarnpkg.com/en/docs/install#debian-stable, these steps are necessary:
curl -sS https://dl.yarnpkg.com/debian/pubkey.gpg | sudo apt-key add -
echo "deb https://dl.yarnpkg.com/debian/ stable main" | sudo tee /etc/apt/sources.list.d/yarn.list
sudo apt-get update
sudo apt-get install yarn
For further work with the webdesign, consult the documentation at Modifying the web design.
Install EOA projects
Create a directory to clone the individual projects to and enter it:
mkdir EOA_sources
cd EOA_sources/
Webdesign files
See the webdesign documentation for installation and usage.
EOA Publication Platform
See Installation with Virtual Environment for installation instructions.
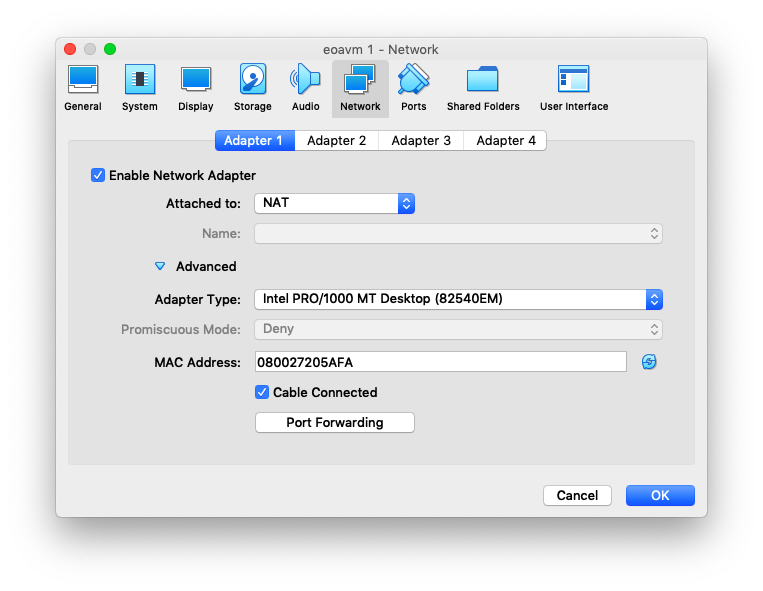
Accessing the web server in the virtual machine with port forwarding
The EOA Publication Platform can be accessed from the host computer by configuring port forwarding. To configure that, open the Settings menu of the virtual machine, select the Network tab, click on Advanced and the Port Forwarding.
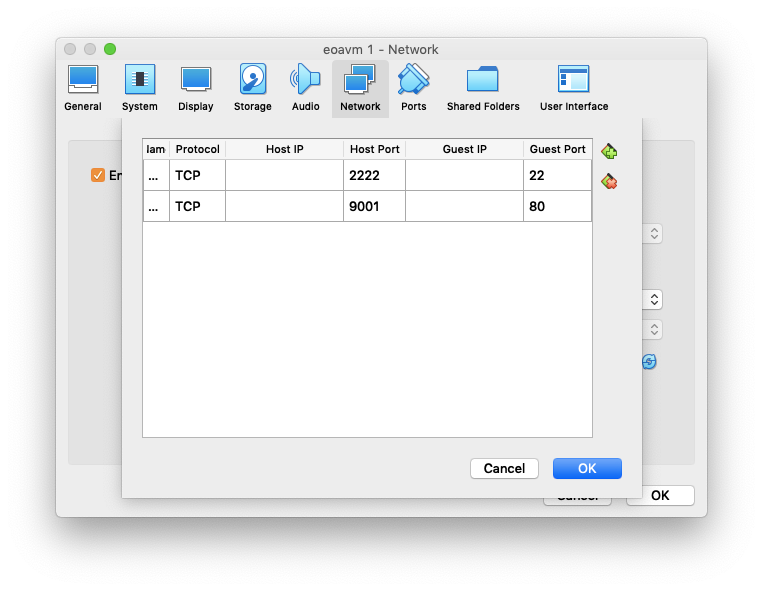
If not already configured, add forwarding rules. Port forwarding works by assigning ports of the host computer to ports of the virtual machine. In the following screenshot, two ports are forwarded:
Port 22 is mapped to port 2222 on the host machine, so that
sshandscpcan be used to access the machine:ssh -p 2222 eoa-user@127.0.0.1
Port 8000 is mapped to port 9001 on the host machine so that a webservice running in the virtual machine on port 8000 can be visited in the browser of the host computer on the address http://127.0.0.1:9001
Enabling higher resolution in the virtual machine
In order to get higher resolutions on the virtual machine, select Devices -> Insert Guest Additions CD image from the menu and install the additions by issuing the following commands in the terminal:
cd /media/cdrom0/
sudo sh VBoxLinuxAdditions.run
Other amenities, like shared folders between guest and host can also be enabled there.